ShopDreamUp AI ArtDreamUp

Deviation Actions


Description
Hi all!!!
Here is the step by step that I mentioned days ago.A friend of mine asked me to do a step by step for my latest piece in artrage,so I saved each stage of the painting.
Remember that this is artrage and I am using just two tools -oil brush and palette knife-. There are no custom brushes here or brushes with funny shapes or anything like that.The painting is very simple so it is this tutorial.
Take a look at it,read the descriptions and take everything you want from it that can improve your skills!That´s what a tutorial is for!I am showing you my workflow,that´s the way I paint,not the way you have to do it!!remember that (Wink)")
Step 1 - I use to see in my mind only the basic shapes before I start drawing.I can´t see the lines itself or the details,so I just try to block those basic shapes with fast brush strokes.
Step 2- I draw the lines over the basic shapes in a different layer.As you can see,some things changed in order to improve the scene,to make it a little bit more dramatic.Also I add some details here and there.Once I am done,I can make the first layer invisible.
Step 3- Blocking out the basic colors. I won´t be considering the main figures in this stage.I just put the basic colors I want the scene to have roughly.In this case,since the world of Hans & Hannah is mostly desert,I choose orange,brown,yellow....
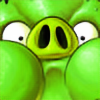
Step 4- Basic color for the desert demon.Green would be cool.Not too bright or dark,a medium green.
Step 4- Fast shadows and lights! I am using brown and dark blueish green for the shadows while for the light I use some yellowish green.Try to be creative and use different colors at this stage.Remember that you have to do everything in the same layer because we want to mix and blend the colors lately using the palette knife.If you have a polychromatic painting,it will be a much more interesting piece!!!
Step 5- As you can see here,I put some red on its shoulders and its face and some purple to make it more polychromatic.I also started to add some bounced light to iluminate the dark parts and give everything more volume.Remember that light bounces everywhere,so keep it in mind!!
Step 6- Just adding more detail!!Don´t be afraid to paint out of the lines because we can erase the excess later since our lines are in a layer on top.
Step 7- DUST!! This is soo funny to make in artrage!!Just put roughly light and shadows and give them shape with the palette knife trying to follow always the same direction,the direction of the wind.Remember that every time I use the brush,then I blend the colors with the palettle knife.This tool gives me smooth surfaces but also create new colors while blending,giving as a result a more polychromatic piece!!
Step 8- Blocking out the basic colors for Hannah and some lights in the monster´s shoulders.
Step 9- More details on Hannah and the monster.Remember to use the palette knife to blend the colors until you are satisfied with the result.I like a painterly effect,so I dont use the palette knife too much,I like to see the paint strokes!
Step 10- Some more details.At this stage,I think it is almost finished.This is a sketch,so I won´t spend more time with it.
Step 11- I take the picture to Photoshop to change some things and add others.I use two different textures here.One is a picture I take of the ground (simple country ground) and the other ones is a pic of a concrete wall.I put the ground one in a layer over the ground of my painting and set it to overlay mode.The same thing with the concrete wall pic,but all over the painting.I set their opacities at about 50%.Changed a little bit the color balance to make the whole picture more yellowish. Also everything looked too dark,so I changed the levels to make it more bright.Added a black frame and....that´s all!!!We are done!
I hope you will find something helpful here!!!
Thanks for your time,guys!!
Note: If you are one of those who hate tutorials or step by steps in order to be cool or try to show that you are soooo good that you don´t need to see how others work,please,get the hell out of here right now......and close the f*cking door.
Here is the step by step that I mentioned days ago.A friend of mine asked me to do a step by step for my latest piece in artrage,so I saved each stage of the painting.
Remember that this is artrage and I am using just two tools -oil brush and palette knife-. There are no custom brushes here or brushes with funny shapes or anything like that.The painting is very simple so it is this tutorial.
Take a look at it,read the descriptions and take everything you want from it that can improve your skills!That´s what a tutorial is for!I am showing you my workflow,that´s the way I paint,not the way you have to do it!!remember that
Step 1 - I use to see in my mind only the basic shapes before I start drawing.I can´t see the lines itself or the details,so I just try to block those basic shapes with fast brush strokes.
Step 2- I draw the lines over the basic shapes in a different layer.As you can see,some things changed in order to improve the scene,to make it a little bit more dramatic.Also I add some details here and there.Once I am done,I can make the first layer invisible.
Step 3- Blocking out the basic colors. I won´t be considering the main figures in this stage.I just put the basic colors I want the scene to have roughly.In this case,since the world of Hans & Hannah is mostly desert,I choose orange,brown,yellow....
Step 4- Basic color for the desert demon.Green would be cool.Not too bright or dark,a medium green.
Step 4- Fast shadows and lights! I am using brown and dark blueish green for the shadows while for the light I use some yellowish green.Try to be creative and use different colors at this stage.Remember that you have to do everything in the same layer because we want to mix and blend the colors lately using the palette knife.If you have a polychromatic painting,it will be a much more interesting piece!!!
Step 5- As you can see here,I put some red on its shoulders and its face and some purple to make it more polychromatic.I also started to add some bounced light to iluminate the dark parts and give everything more volume.Remember that light bounces everywhere,so keep it in mind!!
Step 6- Just adding more detail!!Don´t be afraid to paint out of the lines because we can erase the excess later since our lines are in a layer on top.
Step 7- DUST!! This is soo funny to make in artrage!!Just put roughly light and shadows and give them shape with the palette knife trying to follow always the same direction,the direction of the wind.Remember that every time I use the brush,then I blend the colors with the palettle knife.This tool gives me smooth surfaces but also create new colors while blending,giving as a result a more polychromatic piece!!
Step 8- Blocking out the basic colors for Hannah and some lights in the monster´s shoulders.
Step 9- More details on Hannah and the monster.Remember to use the palette knife to blend the colors until you are satisfied with the result.I like a painterly effect,so I dont use the palette knife too much,I like to see the paint strokes!
Step 10- Some more details.At this stage,I think it is almost finished.This is a sketch,so I won´t spend more time with it.
Step 11- I take the picture to Photoshop to change some things and add others.I use two different textures here.One is a picture I take of the ground (simple country ground) and the other ones is a pic of a concrete wall.I put the ground one in a layer over the ground of my painting and set it to overlay mode.The same thing with the concrete wall pic,but all over the painting.I set their opacities at about 50%.Changed a little bit the color balance to make the whole picture more yellowish. Also everything looked too dark,so I changed the levels to make it more bright.Added a black frame and....that´s all!!!We are done!
I hope you will find something helpful here!!!
Thanks for your time,guys!!
Note: If you are one of those who hate tutorials or step by steps in order to be cool or try to show that you are soooo good that you don´t need to see how others work,please,get the hell out of here right now......and close the f*cking door.
Image size
1498x12046px 7.58 MB
Comments21
Join the community to add your comment. Already a deviant? Log In
Puedo preguntar como le haces para que tus imágenes tengan ese acabo con ruido? Realmente hace que la pieza se vea muy tradicional.  (Smile)")