
Hai!
In this Tutorial I want to give you an insight of how I create my Emoticons. I want to give you some tips&tricks and show you how you might could improve your Emoticons. You obviously don't have to follow these steps to create your Emoticons. But you should always try to do new things. You can't improve if you don't dare to experiment. ;D
In this Tutorial I want to give you an insight of how I create my Emoticons. I want to give you some tips&tricks and show you how you might could improve your Emoticons. You obviously don't have to follow these steps to create your Emoticons. But you should always try to do new things. You can't improve if you don't dare to experiment. ;D
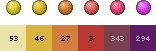
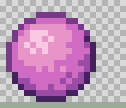
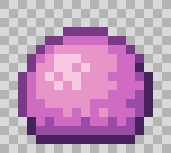
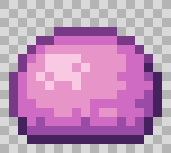
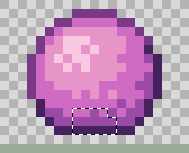
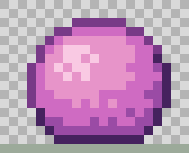
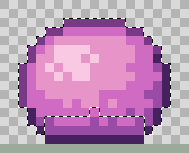
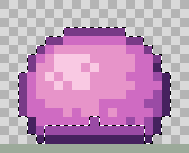
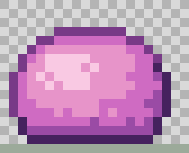
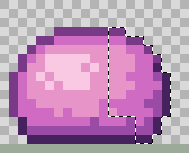
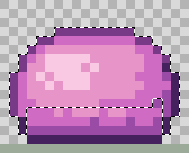
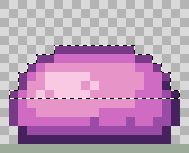
I often notice that Emoticonist use the same hue to shade their Emoticons. I personally think that many of these Emoticons look quite boring, they could be more interesting if they would have used different hues. This also depends a lot on the way how you shade your Emoticons. You can't use the same colours for all shading styles: You have to adjust the brightness and saturation.
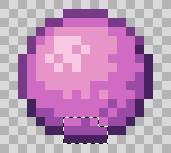
Here is an example of my latest shading compared to some of my older shading styles: (I used the shading in this emote --> )
)

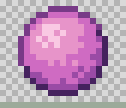
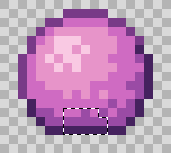
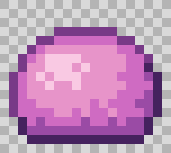
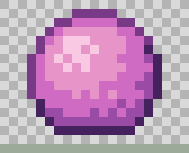
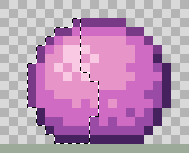
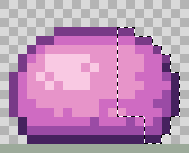
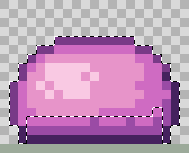
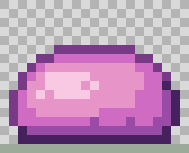
Here you can see how the colouring could have looked like if i didn't try different hues:
As you can see the colouring looks good for the first shading, but it doesn't look that good for the others.
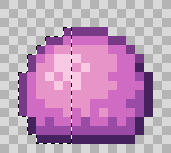
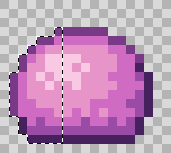
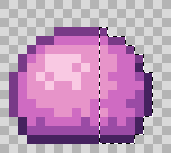
You could either adjust the colours or you could modify your shading.
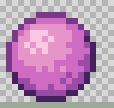
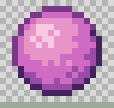
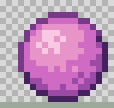
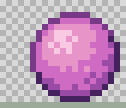
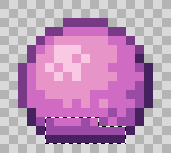
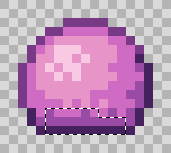
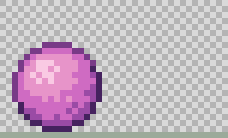
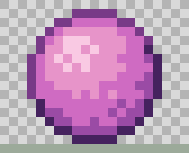
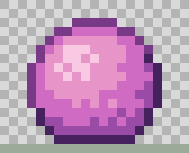
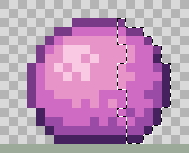
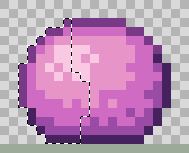
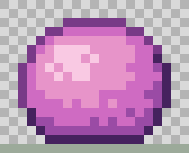
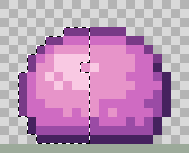
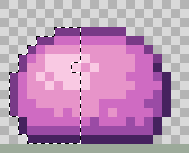
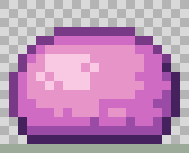
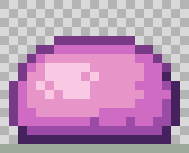
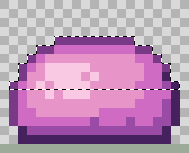
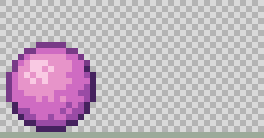
Here is an example of how different the Emoticon could look like when you vary the hues. (I will use my newest shading for the example, the result might look different with your shading.) You also have to adjust the brightness and the saturation if you change the hue from the base shading.

But it also depends on what kind of Emoticon you want to create. ;D
Here is an example of my latest shading compared to some of my older shading styles: (I used the shading in this emote -->
Here you can see how the colouring could have looked like if i didn't try different hues:
As you can see the colouring looks good for the first shading, but it doesn't look that good for the others.
You could either adjust the colours or you could modify your shading.
Here is an example of how different the Emoticon could look like when you vary the hues. (I will use my newest shading for the example, the result might look different with your shading.) You also have to adjust the brightness and the saturation if you change the hue from the base shading.
But it also depends on what kind of Emoticon you want to create. ;D
I usually use 0.09 as Framerate for my Emoticons, I rarely use a different framerate. I don't have the perfect solution to create smooth animations, I can't say move the hand 2 pixels up and 2 pixels to the left side. I often look at the preview of the animation, then change it a bit and then I preview it again until it looks good to me.
Here I want to show you a few different methods how you can create your walking animation. The walking animation really depends on what kind of emotion you want to display, you shouldn't use the same walking animation for all emotions. I encourage you to try many walking animations and also experiment and create new kind of walking animations.
walking
Here I am going to show you different kinds of walking animations, I will also include how it looks like with different hand and face animations.

1. Frame:
This is the starting point. The Emote just stands there.
2. Frame:
Move the Emoticon 1 px up and 1 px to the side.
3. Frame:
Move the Emote 1 px down and 1 px to the side (in the same direction as in the previous step).
Hands and Face animation


1. Frame:
This is the starting point. The Emote just stands there.
2. Frame:
Move the Emoticon 1 px up and 2 px to the side.
3. Frame:
Move the Emote 1 px down and 2 px to the side (in the same direction as in the previous step).
Hands and Face animation


We have to prepare the emoticon base, before we can start with this walking animation.
We need 2 more bases for this animation.
1.
These are the steps to create the first base. (The steps can vary, it all depends on your shading.)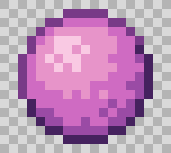

2.
These are the steps to create the second base. (The steps can vary, it all depends on your shading.)steps 1-5


steps 6-10


steps 11-13

1. Frame:
This is the starting point. The Emote just stands there.
2. Frame:
Use the first extra base that we have created, the emote moved 1 px to the side.
(hover over the image to see the steps)
(hover over the image to see the steps)
3. Frame:
Now use the 2nd new base. The outer left pixel line is in the same position as in the previous frame. (same x position :P)
(hover over the image to see the steps)
(hover over the image to see the steps)
4. Frame:
We use the base from frame 1 and we start from the same position as in frame 1. You move the Emote 3px up and 6px to the side.
(hover over the image to see the steps)
(hover over the image to see the steps)
5. Frame:
We start from the end position of frame 4, then the Emote will be moved 8px to the side.
(hover over the image to see the steps)
(hover over the image to see the steps)
6. Frame:
We start from the end position of frame 5, then the Emote will be moved 6px to the side. and 3 px down. Then you replace the current base with the 2nd base (that we created).
(hover over the image to see the steps)
(hover over the image to see the steps)
The next step would be frame 3 again, since frame 2 and 6 are the same.
Hands and Face animation


We have to prepare the emoticon base, before we can start with this walking animation.
We need 2 more bases for this animation.
1.
These are the steps to create the first base. (The steps can vary, it all depends on your shading.)steps 1-5

steps 6-10

step 11
2.
These are the steps to create the second base. (The steps can vary, it all depends on your shading.)steps 1-5


steps 6-10
steps 11-15
steps 16-17
1. Frame:
This is the starting point. The Emote just stands there.
2. Frame:
Use the first extra base that we have created. The outer left pixel line is in the same position as in the previous frame.
(hover over the image to see the steps)
3. Frame:
Now use the 2nd new base. The outer left pixel line is in the same position as in the previous frame.
(hover over the image to see the steps)
(hover over the image to see the steps)
4. Frame:
We use the base from frame 1 and we start from the same position as in frame 1. You move the Emote 3px up and 8px to the side.
(hover over the image to see the steps)
(hover over the image to see the steps)
5. Frame:
We start from the end position of frame 4, then the Emote will be moved 1px up and 9px to the side.
(hover over the image to see the steps)
(hover over the image to see the steps)
6. Frame:
We start from the end position of frame 5, then the Emote will be moved 7px to the side and 3px down.
(hover over the image to see the steps)
(hover over the image to see the steps)
7. Frame:
Now we replace the base from the last frame with the first extra base, while the top and left pixel line are in the same position. Then you move this base 1px to the side and 2 px down
(hover over the image to see the steps)
(hover over the image to see the steps)
The next step would be frame 3 again, since frame 2 and 7 are the same.
Hands and Face animation


We have to prepare the emoticon base, before we can start with this walking animation.
We need 1 more base for this animation. The base is the same as the 2nd base in Version 4. There you can see how you create it.
1. Frame:
This is the starting point. The Emote just stands there.
2. Frame:
Now we have to use the 2nd base from Version 4, this time the left pixel line is not exactly in the same position, it moved 1 pixel to the left.
3. Frame:
We use the base from frame 1 and we start from the same position as in frame 1. You move the Emote 3px up and 2px to the side.
(hover over the image to see the steps)
(hover over the image to see the steps)
4. Frame:
We start from the end position of frame 3, then the Emote will be moved 4px up and 4px to the side.
(hover over the image to see the steps)
(hover over the image to see the steps)
5. Frame:
We start from the end position of frame 4, then the Emote will be moved 5px to the side and 1px down.
(hover over the image to see the steps)
(hover over the image to see the steps)
6. Frame:
We start from the end position of frame 5, then the Emote will be moved 4px to the side and 6px down.
(hover over the image to see the steps)
(hover over the image to see the steps)
The next step would be frame 2 again, since frame 1 and 6 are the same.
Hands and Face animation


I find the most important part of creating Emoticons is to display emotions. The Expression is more important than the animation. You can have the best animation, but if you keep using the same expression for the whole time, it won't be as good as if you would have varied the expression. Here is an Example:
These Emotes have the same animation. The first one uses the same expressions. The second shows more emotion by using different expressions. (it obviously depends on which emotion you want to display with that emote :P.


I have to admit that I am often too lazy to add more expressions to my Emotes, but it can really improve them!
Now to the actual reason why I wanted to write this Tutorial. xD
These things really help me to create my Emoticons, so if you have photoshop you should check if it is possible with your version. (I use photoshop cs4)
Normally you have to zoom-in and out if you are working on your Emoticon, but this way don't have to do that anymore.
You can open 2 windows of the same image, work on the zoomed-in window and immediately see how it looks like at 100%.
Just go to Window -> Arrange -> New window for "name.psd"
Then you can arrange the windows:
Actions can be used to speed up your creation process if you know how you use it. You have steps in your creation process that you have to do over and over again? Why not create an Action for it? Then you just have to click a button to do it.
You can find the actions window under Window -> Actions
First let me show you the "actions"-window:, there you can see the important buttons for the action window:
The hardest part is to recognize when it would be easier to create actions. c:
Because I was too lazy to check if you could add keyboard shortcuts for these commands, I created actions for them. xD
I have actions for Duplicate animation Frame, Activate next Frame, Activate previous Frame , Create New Layer, Create New group
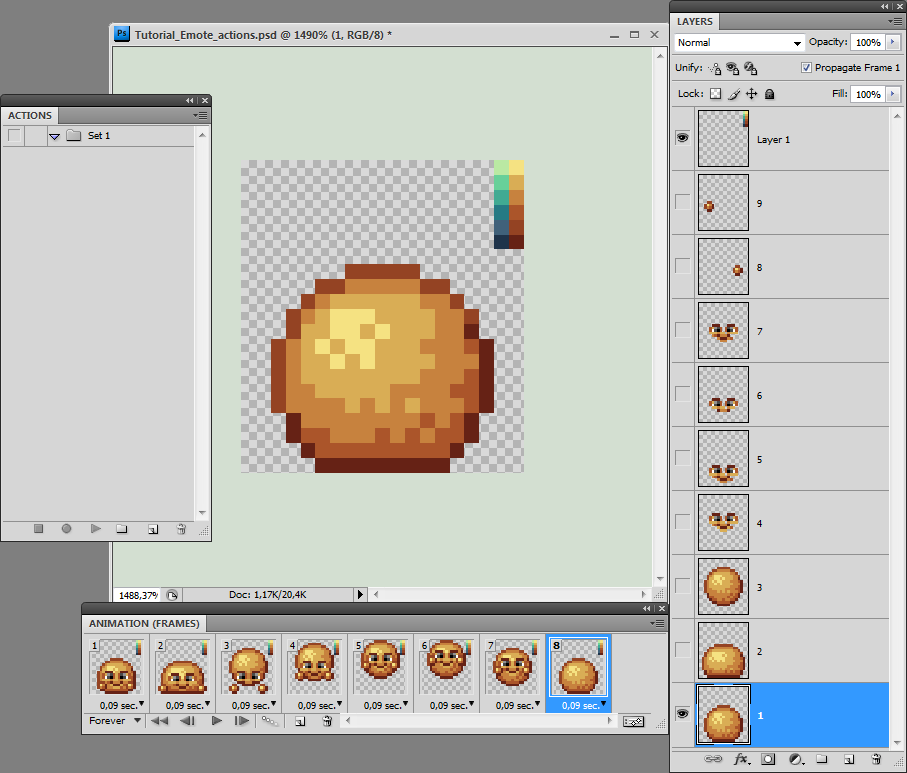
Changing the colour of the Emote.
This only works with manually added shading, not with gradients.
You finished your animated Emoticon, but for whatever reason you start to dislike the colour, but it would be too much work to manually change the colour.
Actions can be useful for this:
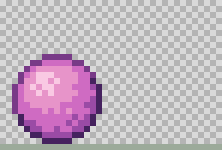
You have this emote:
 and want to change it to this:
First of all you have to create a new frame (it should be the last one), you hide everything except the first layer.
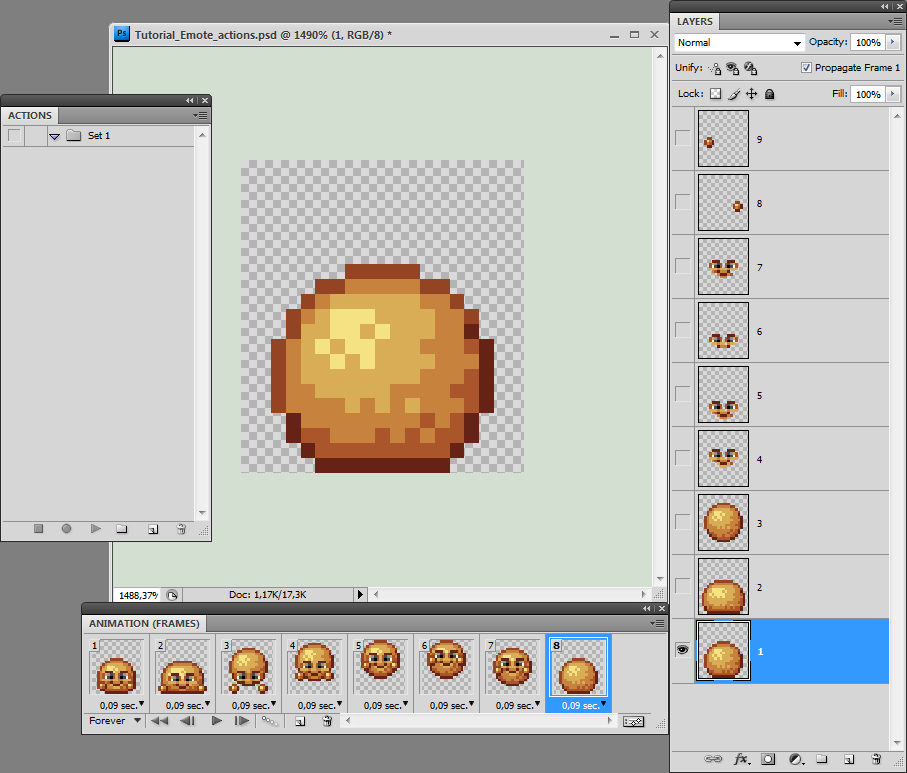
Add a new layer with the colour ramps of your old and new base. It should be in a place where it doesn't hide any of the other parts of the Emote.
Then you click Create new Action in the Actions window(Before you click on it make sure that you have selected the first Layer.) .There you can change the name and also set a function key, it automatically starts to record if you click on Record.
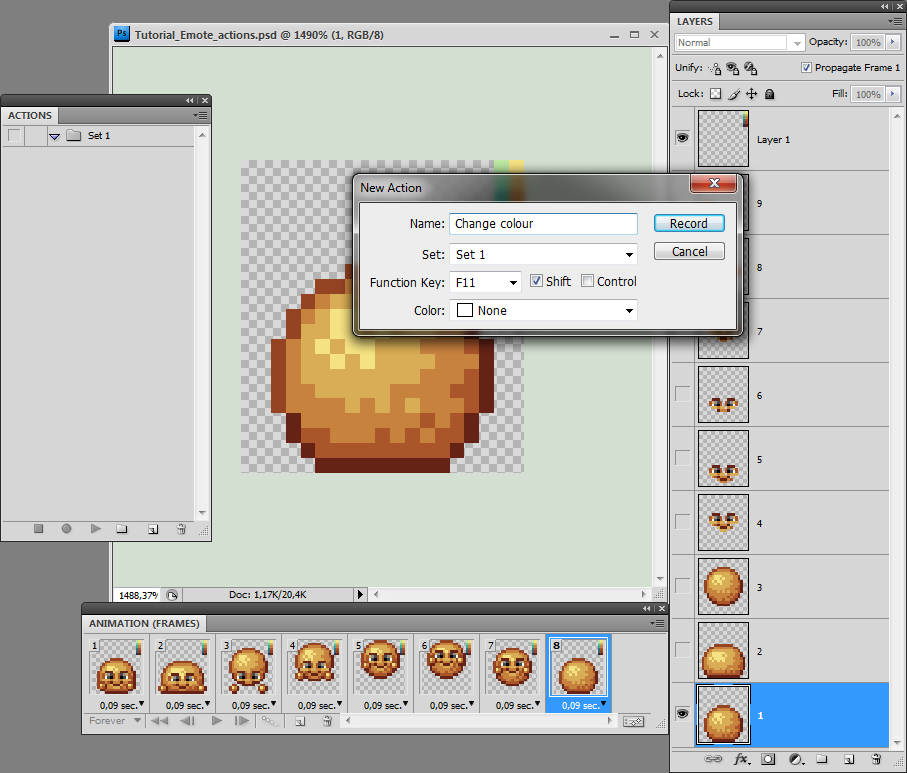
Select the Paint Bucket Tool and make sure the "All Layers" checkbox is checked (this is important).

We select the first colour from the colour ramp and use the paint bucket and click on the colour next to it (on the colour ramp)
It changes the colour of the Emote, it also adds a new colour on the place where the colour ramp is, but we don't have to worry about it. (you can see that if you pay attention to the first Layer in the Layers window.
Repeat the "select colour and fill colour on ramp" until the colour of the Emote is changed completely.
Now you have to select the colour ramp and delete it then you deselect it. Then you can click on stop recording/playing.
Now you can select the next layer (don't forget to hide the previous layer). And then you can either use the keyboard shortcut that you have selected for the action (shift + F11 in this case) or you select the name of the action and click on Play selection. You can see how it changes the colour of the Emote. Do this for all Layers, then you can delete the frame and the colour ramp layer. You can save the "new" Emote. c:
I have to say that it will only work for this particular document, you will have re-do these steps if your next document has a different canvas size or when the colour ramp is in a different place.
I hope this Tutorial, these tips+tricks were at least a bit helpful. xD It took way too much time to write it. :P


