

Community Week
Heya, people! I'm back again with a new article/tutorial. The Watercolor Guide For Beginners Part 2! Since I submitted part one, I received very good feedback, so I decided to make another part for you guys. I hope you like this one too! This part will mainly include how to start off with watercoloring, setting up your workspace, precautions, and a glimpse of Part 3!
........................
The Index:
To make every topic clear and concise, I'll be dividing the article into the following topics:
- Introduction
- Starting off with watercolors
- Setting up your workspace
- Precautions to be remembered
- Glimpse of the next issue

- A word for Thanks!
So let's GO!
....................................
Introduction:
Starting Off With Watercolors:
- Painting
- Background
If you are choosing a scenery with daylight, then the amount of water used in the background shall be more according to the color/shade and if the scene is in dusk, the amount of water used should be less according to the shade/color. Why did I mention according to shade/color ? This was because warm colors (black, brown, red, orange, yellow) have a high impact on the vision of the viewer and hence need to be used with a limited amount of water; whereas the cool colors ( shades of blue and green) have a generalized impact on the vision of the viewer and hence can be used with a great amount of water!
- Main Character
In a painting, if main characters are humans, then you have to take care that the shade used for various parts of the body should match with the actual natural colors of the humans. A common mistake that people do with the shade of the skin is that they use the shades of ORANGE rather than shades of BROWN for the skin. This happens because the shade of orange is more closer to the shade of the skin and hence we find it more appropriate, but actually the correct shade to be used should be of a brown origin! This doesn't mean that one can't use orange for shading the skin, it can be used as a mid-tone for enhancing the visual impact of the artwork!
One important thing to remember is that the more water you add to a particular shade, the lighter it becomes!
One important thing to remember is that the more water you add to a particular shade, the lighter it becomes!
- Textures
With the coming of watercolors, comes the addition of 'Textures' in a given painting. The textures enhance the beauty of your painting and also increase your painting's visual impact on the viewers. The textures can be made using a variety of items available at home. However, for some acids you may have to try going to a market!

Some of the texture making substances are listed with their effects on water color in the given tutorial by the awesome hatefueled and Dragondust: Their tutorials are simple, easy to learn and concise! Do have a look at the below mentioned tutorials!

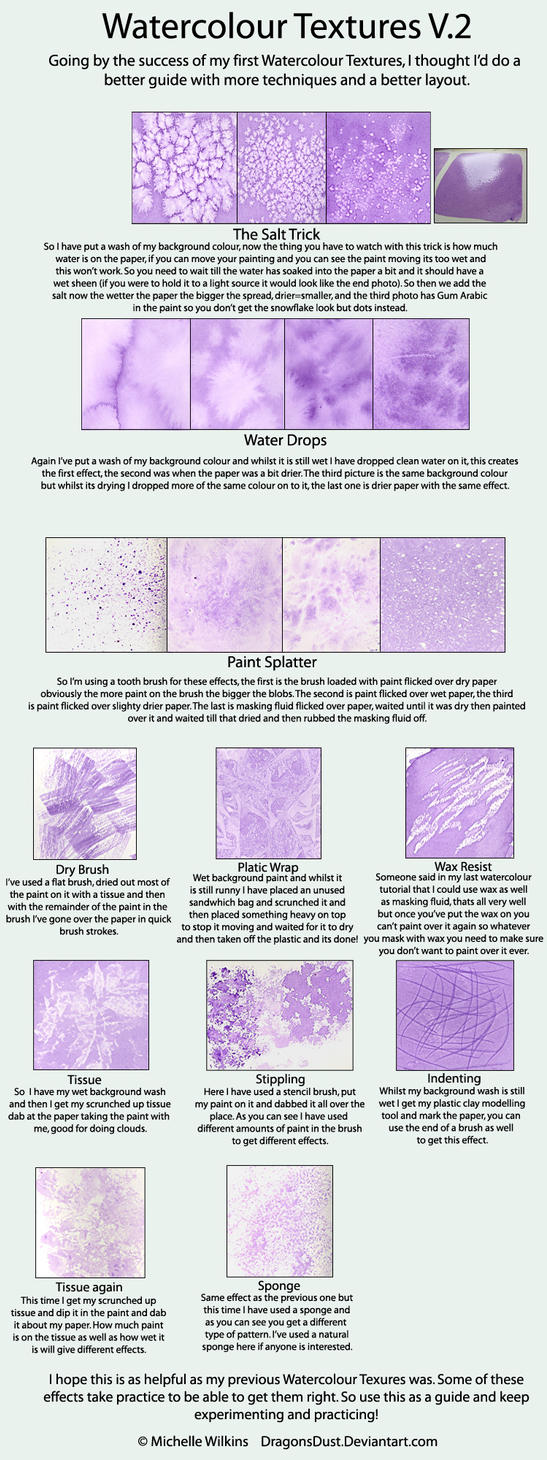
I hope that the types of textures are clear to you by the above tutorials!
..............
In the previous article of mine, I showed you how to set up your painting stuff in an assorted box, now you'll learn to set up your workspace. After knowing and starting off with watercolors, it is important to set up your workspace - an area where you paint and keep all your needed accessories for painting. It holds all your papers, brushes, paints, containers, etc. The essential items that you need to have before starting painting are listed below:
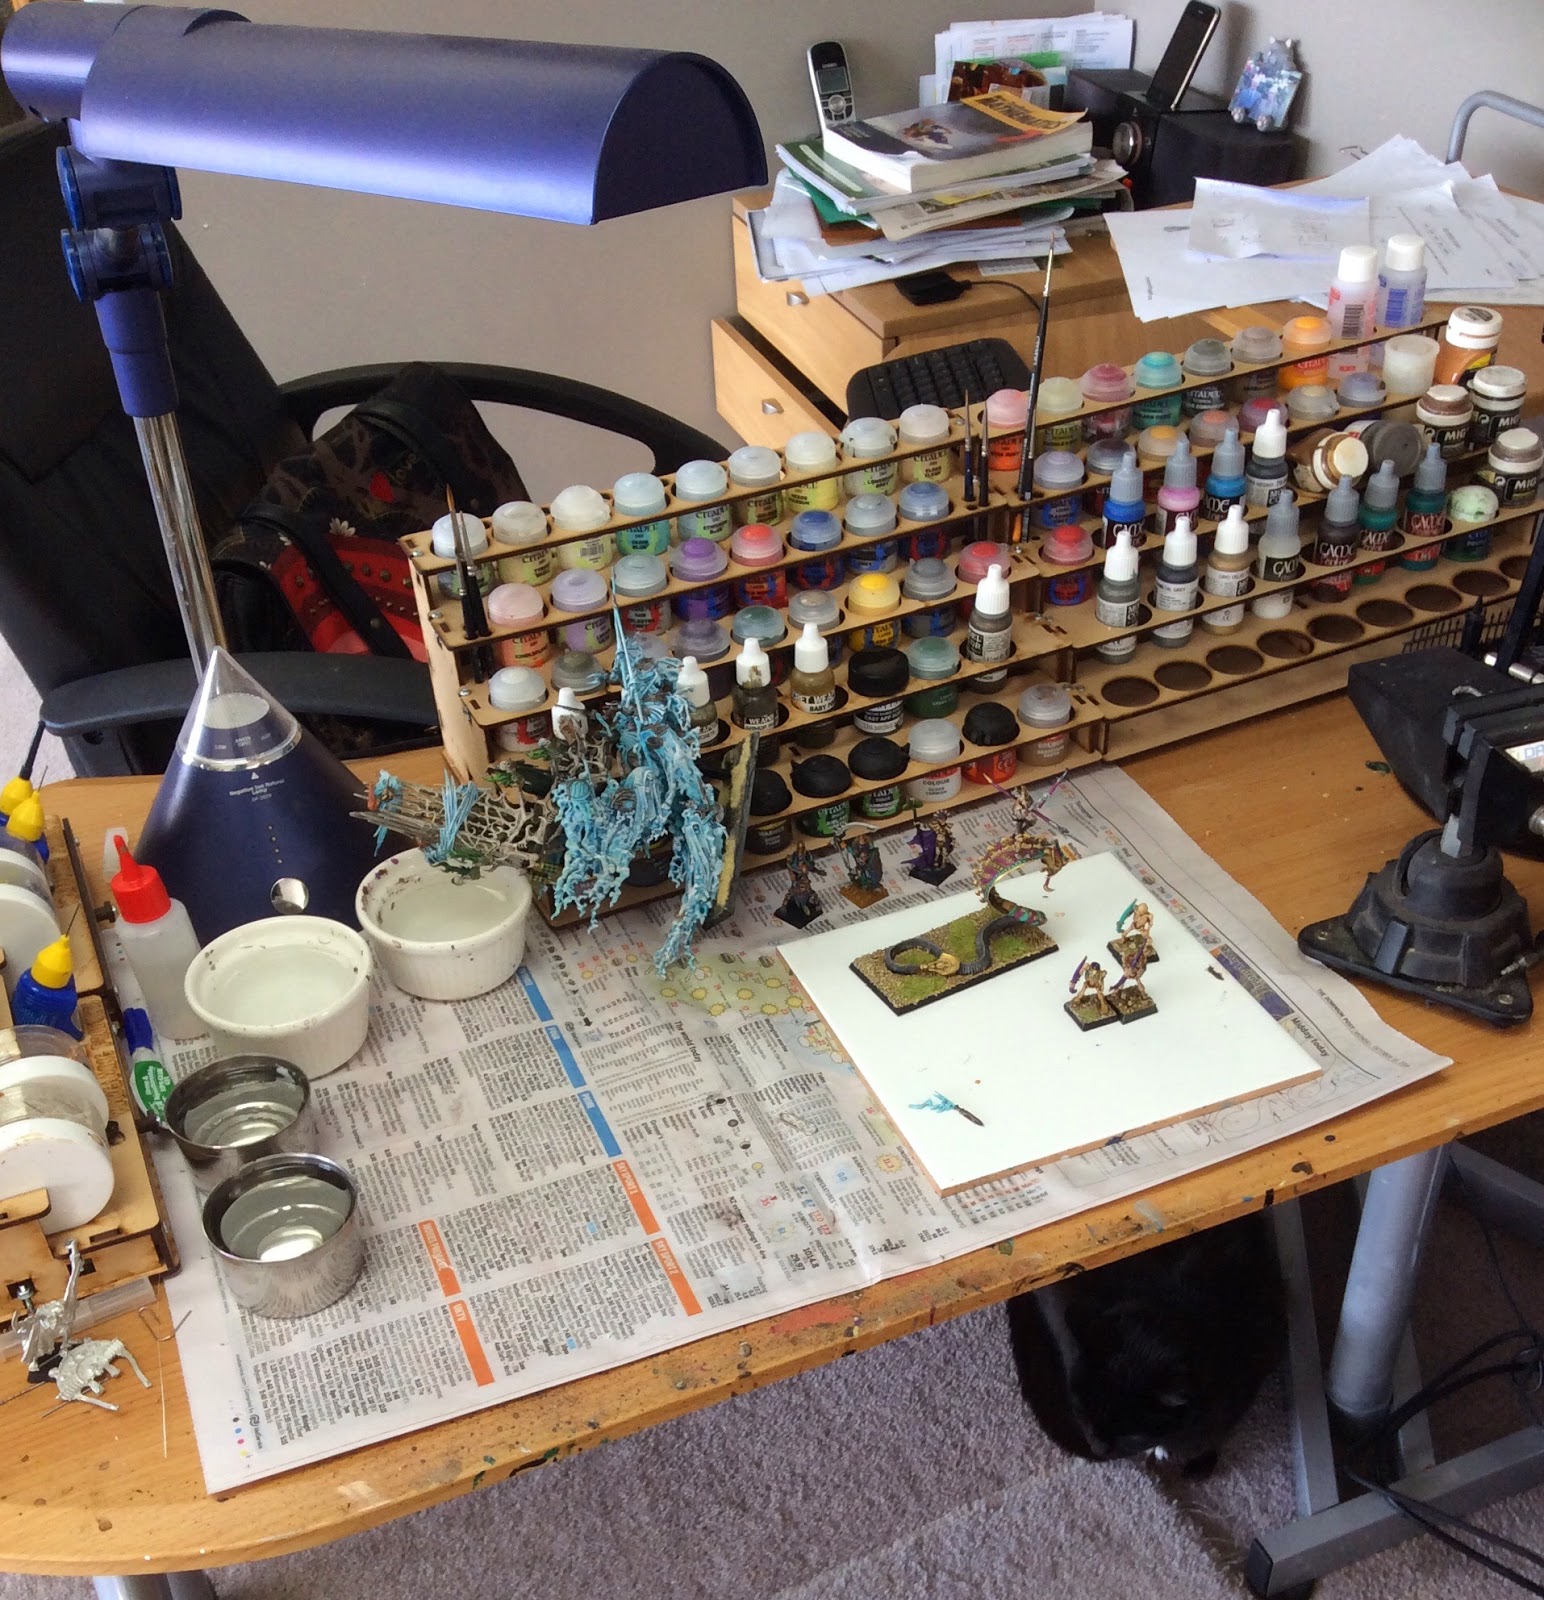


(CREDITS: Img1:4.bp.blogspot.com/-4WNcJDy8Af0… , img2:s-media-cache-ak0.pinimg.com/2… , img3:i496.photobucket.com/albums/rr…)
The method for setting up the workspace is as follows:
1) Have a clean desk, polish/wipe it with the spare cloth
2) Spread the newspaper on the desk
3) Make separate compartments/areas for paints, palettes, etc.
4) Put the brush box and water container in the periphery of the main area.
5) Spread the working paper in the center
6) Tape it along the corners to prevent paint overflow
7) Your workspace is ready!
Some of the texture making substances are listed with their effects on water color in the given tutorial by the
awesome hatefueled and Dragondust: Their tutorials are simple, easy to learn and concise! Do have a look at the below mentioned tutorials! I hope that the types of textures are clear to you by the above tutorials!
- Brush Strokes
In painting with watercolors, there are various brushes that you can use. In the previous article, I gave examples of various brushes that can be used for painting. Now, I'll show you what type of stroke each one gives:

2. Round Brush Strokes: (credit: emptyeasel.com/wp-content/uplo…)
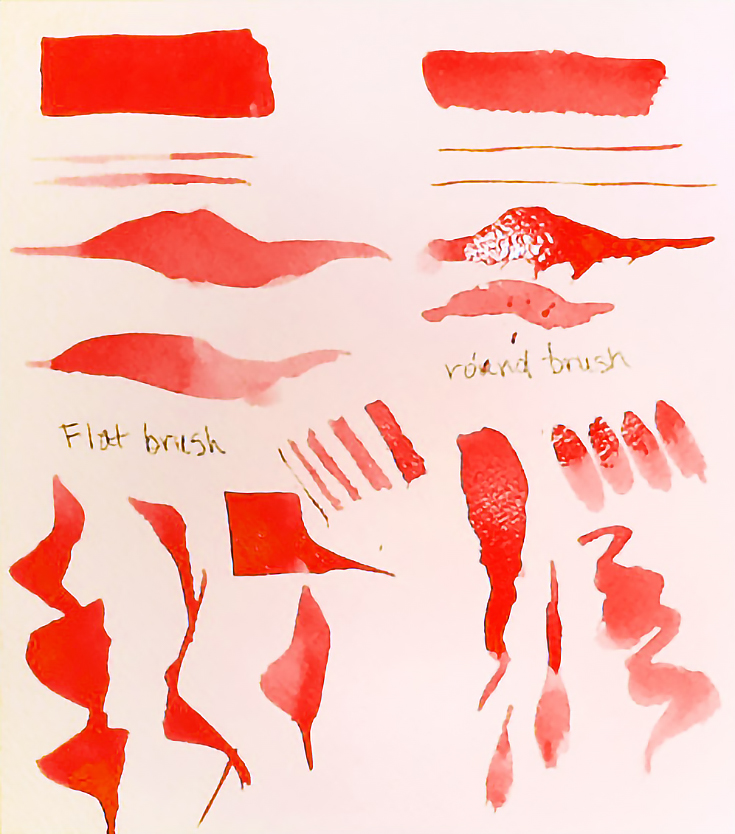
3.Bright Brush Strokes (credit: rondapalazzari.typepad.com/.a/…)

4.Filbert Brush Strokes (credit: rondapalazzari.typepad.com/.a/…)

5.Fan Brush Strokes:

6. Script/ Rigger Brush Strokes


- Flat Brush Strokes: (credit: thumb9.shutterstock.com/displa…)
2. Round Brush Strokes: (credit: emptyeasel.com/wp-content/uplo…)
3.Bright Brush Strokes (credit: rondapalazzari.typepad.com/.a/…)
4.Filbert Brush Strokes (credit: rondapalazzari.typepad.com/.a/…)
5.Fan Brush Strokes:
6. Script/ Rigger Brush Strokes
All the strokes :
I hope the first part is clear to all of you! And also I hope I'm being clear and concise till now!
Setting Your Workspace:
In the previous article of mine, I showed you how to set up your painting stuff in an assorted box, now you'll learn to set up your workspace. After knowing and starting off with watercolors, it is important to set up your workspace - an area where you paint and keep all your needed accessories for painting. It holds all your papers, brushes, paints, containers, etc. The essential items that you need to have before starting painting are listed below:
- A clean desk
- A spare cloth (for emergency of water spilling)
- A spare newspaper (for cleanliness)
- A water container
- A box for brushes
- A paint box
- A box for papers
- A masking tape (for sticking the working paper)
(CREDITS: Img1:4.bp.blogspot.com/-4WNcJDy8Af0… , img2:s-media-cache-ak0.pinimg.com/2… , img3:i496.photobucket.com/albums/rr…)
The method for setting up the workspace is as follows:
1) Have a clean desk, polish/wipe it with the spare cloth
2) Spread the newspaper on the desk
3) Make separate compartments/areas for paints, palettes, etc.
4) Put the brush box and water container in the periphery of the main area.
5) Spread the working paper in the center
6) Tape it along the corners to prevent paint overflow
7) Your workspace is ready!
....................
Given below are some instructions that shouldn't be forgotten while starting to paint:
So these were some of the main precautions to remember! And this brings us to the conclusion of this article! Thank you soo much! Oh wait....there's more!
The next issue will cover the following topics :
Precautions To Be Remembered:
Given below are some instructions that shouldn't be forgotten while starting to paint:
- Don't forget to spread the newspaper on your desk. It increases the security when paints spill.
- Never leave the lid of paints open, they may get squashed by an unknown entity
- For water-spill safety, use spill resistant containers:

- Don't leave your paint tubes in a hot environment for long time, they may react weirdly!
- Don't forget to have a spare cloth with you, it helps in cleaning excess water!
- Don't leave your brushes with paint dry in the open, this would reduce their performance!
- Don't leave pan paints wet in moist surroundings for a long time!
- Don't overuse water on paper, it may blot like hell

- Remember all of this!

So these were some of the main precautions to remember! And this brings us to the conclusion of this article! Thank you soo much! Oh wait....there's more!
Glimpse of the next issue!
The next issue will cover the following topics :
- Watercoloring basics
- Making a rough sketch
- Base painting
- Shading!
...................................................................................................................................................................
For more info and questions, you are free to note me up! You may also ask in the comments if you have any queries! 
...................................................................................................................................................................
I thank all of you, my friends, the editors, the advisers and all the other staff people for helping me out in bringing up this article! If you hadn't been there, this article wouldn't have been a successful one! KEEP BEING AWESOME!
................................................................................................................................................................
article written by Tudalia-Hex for projecteducate's Community Week

...................................................................................................................................................................
A word Of Thanks!
I thank all of you, my friends, the editors, the advisers and all the other staff people for helping me out in bringing up this article! If you hadn't been there, this article wouldn't have been a successful one! KEEP BEING AWESOME!
................................................................................................................................................................
article written by Tudalia-Hex for projecteducate's Community Week
Thank You


