About: Creating The Illusion Of Space And Depth

13 min read

Deviation Actions

TheFantaSim's avatar
By
Published:
1.4K Views
NEWS


This is one of our "About" Lessons; a series of  journals about Photomanipulation, about Art, and about being an Artist.  These journals exist to help you, the Photomanipulator, be a better artist.  After all, we are artist who use Photomanipulation as our media, but to create great art, we must know what we're doing. Also, I want our group members to be educated in using the appropriate language.

This "About" Lesson is my third revamp version on the all important art technique, How to Create the Illusion of 3D Dept on a 2D surface.  


Space exist in the real three-dimensional world.  It is the space between and around objects.

Depth is the quality of being deep; deepness. 

:bulletblack: There may only be a distance of a few inches of space between and around one object to another, (for example, from the front of my monitor to the back of my office wall) or many miles (such as looking across the ocean or a highway).  

The more the Space, the deeper the Depth.


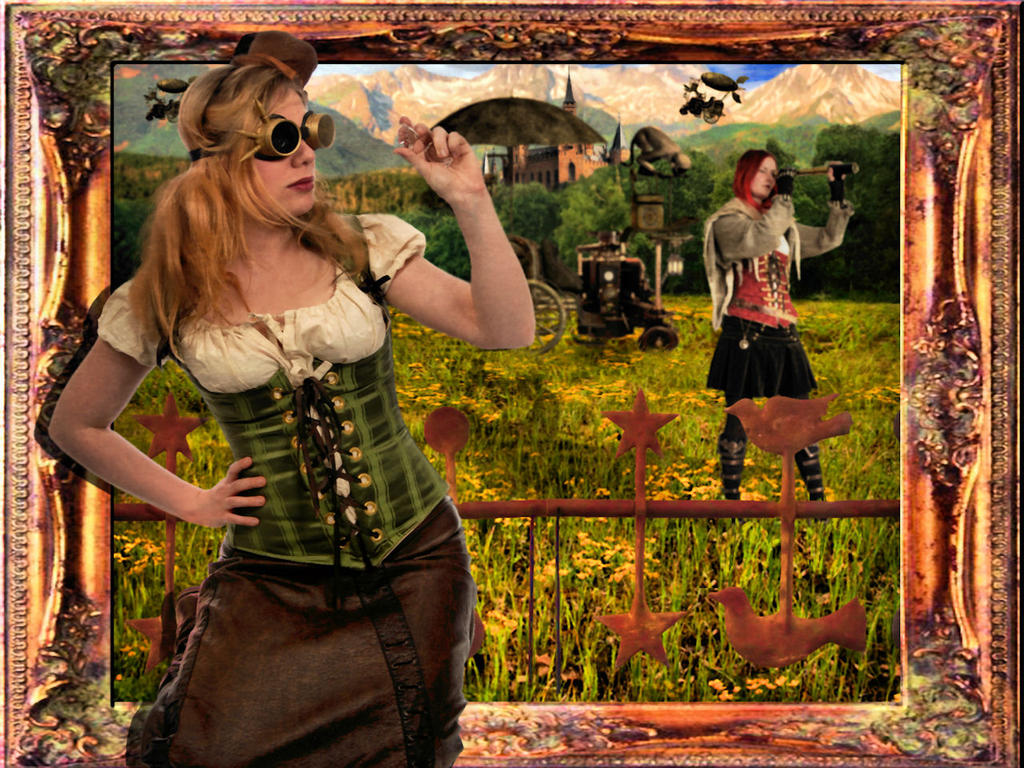
     Open Window by TheFantaSim


:bulletblack:  If you were to go outside your home right now and look in one direction or the other, you will see and experience the three reasons why Space and Depth appears in your view.

1. By Overlapping: When objects overlap (one object partially hidden behind another object), our minds perceive which is the closest object or what is the object on top by how much of the object is revealed. The next closest, the object after that, and so on in order, can be determined by how much of those objects are shown or hidden.  


Polaroids by TheFantaSim    A Scientific Expedition by TheFantaSim


2. With Linear Perspective: Where the sky meets the earth is called the Horizon Line; our mind perceives a focal point where invisible parallel lines meet on the horizon. These lines appear to become narrow as they move to that same one focal point.  

In addition, large objects appear become smaller as they move towards the horizon line, and grow larger as they go away. Objects above the horizon line appear smaller and lower as they move towards the horizon.

Good Tidings for Christmas by brandrificus   Population 2.5 by robhas1left


3. With Atmospheric Perspective: Our eyes will perceive objects in the Nearest Foreground as being the largest, clearest, with the most detail. As objects move back into the Furthest Background (the furthest away that you can see with or without aide), they become smaller, fuzzier, and lose all detail.


delete dream scene II... by metalromantica     My Sisters And I by TheFantaSim

Since we as artist work on a   2D (two-dimensional) surface (paper, canvas, wood, digital screen), there's rules we have to follow and tricks we can utilize to get the illusion of Space and Depth.


Atmospheric Perceptive: The RULES For  Creating The Illusion Of Depth--Laying Out A Landscape
 

:bulletblack: Look at Figure 1 below.

It is a landscape divided into the natural Six Levels of  Atmospheric Perspective: Nearest Foreground, Foreground, Nearest Middle Ground, Middle Ground, Background, Furthest Background

Notice, how even though we are only viewing a shot the ground without seeing the sky, the areas of the landscape still slowly lose detail from Nearest Foreground to Furthest Background. In addition, the colors are becoming a little fuzzier as the we look from the front towards the background. 

They are subtle changes, I admit, but we must make sure to alter our stock to create the illusion of Space and Depth, the way it appears in Nature, or we confuse the viewer. Of course, unless that's what you want to do.;) 

Fig. 1

Creek-smple atmsphrc prspctve by TheFantaSim


:bulletgreen: Everything in the Nearest Foreground is the largest items, have the most clarity and the most detail of anything else in the image.

Of course, this rule has an exception, as shown above.  You have to be careful when working with small objects like butterflies, insects, rocks, and the like.  These items  are extremely small, so they will not be the largest, tallest objects in the image; they are still, nevertheless, the clearest and show the most detail.

:bulletblack: As models and objects move away from the Nearest Foreground  towards the Furthest Background, they slowly become smaller, lose their clarity, become fuzzier, and paler in tone. 

:bulletblack: The Foreground, the Nearest Middle Ground, and the Middle Ground is usually where the Emphasis exist and where all of the activity takes place, therefore, together, they are going to be the largest areas of any image.


Atmospheric Perceptive: How To Create-- Objects  In The Sky

Birds, bats, dragons, and other things with wings, are often added to the air in a photomanipulation without much thought. Now you know that everything, every object, falls under the laws of Atmospheric Perspective

I found some old stock on a CD, and it says that this original stock is from Della-Stock, but I can't find it at her website. Oh, well. At least I gave it credit. :heart:

We all know that birds flock together with their own kind, and only a few birds live in solitude. Either way, this walk through should help you understand how to add birds to the sky.

:bulletblack: Fig. 2 Nearest Foreground

Each of these figures below are exactly the same size, and I added the same swans to each. The size and detail of the swans changes to indicate the set of swans position in the sky.


Example-atmpprspctve-sky6 by TheFantaSim
These swans are very close, don't you agree?  We don't even see all of their bodies.  Our brain tells us what we are seeing by using "Closure"; the act of bringing to an end.


Fig. 3 Foreground                Fig. 4 Middle Ground

Example-atmpprspctve-sky5 by TheFantaSim          Example-atmpprspctve-sky4 by TheFantaSim

In the Foreground, we can see the entirety of the two swans, however, the detail is a little blurry. The swans in the Middle Ground are not only smaller, but, also has very little detail. Still, our brain tells us they are birds; (I know now that I shouldn't have change the tone of the swans to blue)  they're in the sky, and we recognize the shape of the body and wings. They, therefore, must be birds.


Fig. 5 Furthest Middle Ground   Fig. 6 Nearest Background

Example-atmpprspctve-sky3 by TheFantaSim          Example-atmpprspctve-sky2 by TheFantaSim
In the Furthest Middle Ground and Nearest Background, we can see only shapes. Once again, we rely on our experience to tell us that those objects, blurry and without details, are still birds.


Fig. 7

Example-atmpprspctve-sky by TheFantaSim
Here are the 5 layers when merged together. I had to do some rearranging with one or two wing layers to get this arrangement.

Of course, the further out are the flocks, a few birds, or an individual bird is in the sky, the smaller, fuzzier, and  paler the will appear.

In addition, when you do add one single bird, please make sure that it looks natural in the image, following the rules above, so that it doesn't look like it's out of place:

Fig. 8 
The First Cardinal by TheFantaSim


Atmospheric Perceptive: How To Create--Small Things That Fly Or Crawl


Insects can swarm or  form groups of various sizes, have large nests, be attracted to the same thing, or they can be an individualist. They go where ever they please, when ever they please, including crawl over one another.  Which ever, remember that that the same rules apply.

As birds, insects in the air do not  take up the exact same space as another flying insect at the exact same time, so they will not appear exactly the same size with the same clarity. 

And, no matter how large an insect is small, they are not as big as a bird, etc., so you have to be careful and plan your insects  in a more believable manner as you're adding them to your image.


Fig. 9

Mushrooms And Fireflies by TheFantaSim

This is a floral image created with 3D rendered stock.  Notice how you can easily see the fire fly in the Middle Ground, the Background and the Furthest Background and how they change size and lose detail. This helps give the illusion of Space and Depth.

Since I see so many photomanipulators who love to add butterflies (I'm raising my hand saying, "me, me!" ) to their image, let's look at how to include them the right way.

Since certain butterflies are attracted to certain plants or trees, you will see many of the same butterflies interacting over the same flowers.  Still, they do not take up the exact same space at the exact same time.


Fig. 10

E=ex-atmprprspct-butterflies by TheFantaSim


There are 5 butterflies in the image above. I marked them in white so that they would be easier to see, but I forgot to mark the fifth one. Still, you should be able to see how the largest butterfly is in the Nearest Foreground, and how the butterflies get smaller as they move towards the Elven maiden.

Below are three other examples of the addition of butterflies to an image.

Remember, butterflies are small!  Our brain will tell us which order they exist in the picture plane by size and clarity that we see with our eyes.


Fig. 11                          Fig. 12

Nymph In The Meadow by TheFantaSim       Morning Nymph With Butterflies by TheFantaSim

Fig. 13

In The Air by TheFantaSim


That's all.

If you ever have questions, unsure about something, or would like for me to look at any deviation to help you with it, you may send a note to me at ManipulateThis, or even to my deviant art account.
Okay?
:blowkiss:

TheFantaSim


Comments10
Join the community to add your comment. Already a deviant? Log In