Hello! Welcome to another Tuesday Tips. I did a Fractal Art Tweaking Intro last Tuesday Tips to introduce people to the concept of Final Transform. However, it was a very surface level idea and can leave a lot of people confused. So I decided to do a part two and go through the tweaking process step by step in excruciating detail to give you guys an idea.
For this intro, I am assuming you have Apophysis 7X installed, but you don't have any prior knowledge. If you haven't installed it yet, the links are at the end of this journal. If you want to further experiment with your fractal or a new one, I have linked a few fun tutorials at the end too. Reading the Part 1 for this would help but isn't necessary. The params I used for this tutorial are also linked at the end. Let's begin:
"Tutorial"
Loading parameters:
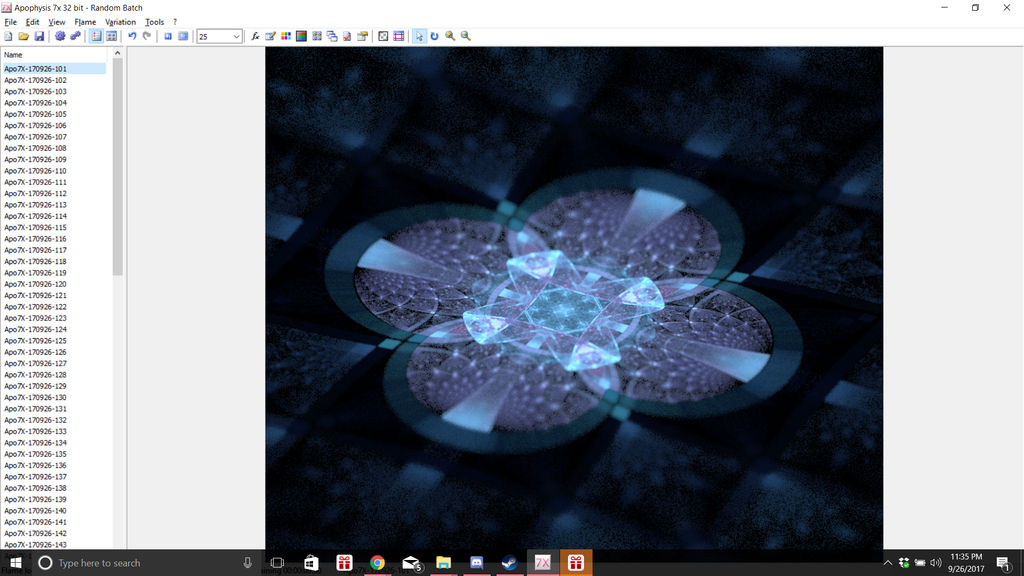
When you first open Apophysis 7X you can see a list of randomly generated fractals on the left.

If you are using predefined params, you can only use Copy the Parameters and Paste it directly as you open the interface as if you were copying text and pasting it into Word.
Once you have chosen the parameters, you want to edit click fx to open the function editor. You should see this window popup:

This is where as Fractal Artists you spend 90% of your time. Let's move on to the fun part.
Tweaking with Final Transforms:
Last time I mentioned that Fx or Final Transform is the best way to edit your fractal and get Dramatic instant changes. Let's see that in action. To start the Final Transform select the Fx button on the top bar of your editor. This should pop up a White Triangle with the other Transforms. The example already has this enabled. Select the white Triangle and pick a parameter that seems to show the most promise. In my case, I will choose swirl = 0.05

You can see that a simple change to swirl added a Dramatic effect to our original fractal. It swirled our original fractal. You might notice that adding that such a small value added a huge effect. You are free to experiment but Final Transforms tend to be very sensitive so starting at low values can help get the desired effect faster. Let's see another change. Reset swirl = 0 and add sinusoidal = -0.2. Pretty!

You can make a lot of changes with Final Transforms and don't shy away from using multiple variables at the same time or even negative values. Keep experimenting. Let's move on to another technique that adds a little oomph!
Tweaking with Pitch and Yaw:
Personally, this is the best way I have found to add a nice little effect that I like. You don't have to do this, but it helps. First, add flatten = 1 to the Final Transform. It should have next to 0 effects on your transform or so it seems. Now close the Editor menu and go to View -> Adjustment. This should bring up a different pop-up.

On the left side of this new pop up, you should be able to see a mini image of your fractal now drag that image around to give it a more 3D feel. Stop when you like. You might notice that this changes the Pitch and Yaw of your image. Experiment to your heart's content. Then add Depth Blur = 0.3 to increase the 3D feel. This will add a blur effect right next to you and away from you. I tend to stick to lower values but feel free to change as you feel.

Making your own:
Now to add a final touch to this piece, change the gradient to what you see fit. A fast way to do this is to close this pop-up and go to Flame -> Randomize Colors. This, you guessed it, Randomizes the colors. You can also go to View -> Gradient to play with the amazing gradients there.

Conclusion:
With just a few simple little edits like that, you can make something unique. These values mentioned are just for demonstration and you by no means are constrained by any of these variables or even these techniques. These are meant simply to get you started. Let us know what you think of these tips and let us know if you do anything new using these tips or if you guys have your own tips, share them with us. Have fun tweaking!
Links and Fun Stuff
Apophysis Download: Apophysis7X
Params used: Mural
Other params to use: Izanami the Params, Broken Dreams Params
Some Great Tutorials: 3D Bloom, Splits and Eliptical
Skin by SimplySilent
