I make this quick tutorial at the request of  who wanted to know how to "simulate the dynamics of a ball (solid) in a bag (fabric) subject to gravity" with DAZ Studio and dForce.
who wanted to know how to "simulate the dynamics of a ball (solid) in a bag (fabric) subject to gravity" with DAZ Studio and dForce.I explain here the approach that I would adopt for this project using only the basic primitives of DAZ Studio. For a more successful achievement it would be necessary to go through a modeler like Hexagon. But the principles, as I explained them in my previous article, dForce experiments, remain the same. Here is a quick summary:
- dForce only processes the surface of objects. In its present state it ignores the notions of volume, density, rigid bodies, soft bodies, or fluids. (But I guess that this gap will be partially filled in the next updates of Studio.) So, in the meantime, we must hack.
- The rigidity of the surfaces depends much more on the mesh resolution than on the settings of dForce itself.
So our ball will have a reduced number of facets while the bag will have a fine mesh.
Here is the step by step of the demo. You will adapt it to your needs.
1 - First of all, we must setup the "Timeline": "Total" to 75, and the cursor on frame 0.
2 - Create a 25cm diameter sphere with 16 divisions in both axes. Name it "Ball". Then move it in Y + 1.00cm. Important: for all the primitives that we will create make sure that "Origin:" is "World Center" and that "Primary Axis" is "Y Positive"; so we will not waste time aligning objects.
3 - Create a 30cm cube with 32 divisions per side. Name it "Bag" and resize it to 125% on the Y axis.
4 - Make sure "Bag" is selected and go to the Geometry Editor.
5 - Select all the polygons on the upper side.
Edit: 6 - If you're using DAZ Studio 4.11+ right-click on the object then click on "Geometry Visibility> Delete Selected Polygon(s)". Go on step 8.
6 - "Right-click" on the object, then in the menu that opens click on "Geometry Visibility> Hide Selected Polygon(s)".
7 - Again "right-click", then "Geometry Editing> Delete Hidden Polygon(s)" and confirm. Now you have something that roughly looks like a bag. Exit the geometry editor by clicking on the "Universal Manipulator" tool.
8 - Now create a "Torus" with the following parameters:
Major Diameter: 40cm
Minor Diameter: 2cm
Segments: 4
Sides: 6
9 - Name the Torus "Strap". Move it in y + 29.00cm and rotate it 45° by the Y axis. The Strap should come to fit the outline of the bag.
10 - Select the Ball and assign it the "dForce Dynamic" properties. Do the same for the Bag.
11 - Assign the "dForce Static" properties to the Strap. It will serve two purposes: to close the bag by "choking" and to prevent it from falling by gravity into the infinite void of virtual worlds.
Reminders: a static object does not undergo gravity but participates in the simulation, so that if it intersects with a dynamic surface it will fix this surface at the intersection point acting as a pin.
12 - Select the Strap, switch to the Timeline, move the cursor to frame 74 and add a "control key" by clicking on the small key that bears the "+" sign.
13 - Go to the object parameter panel to resize the Strap at 25% on the X and Z axes.
14 - Move the Timeline cursor back and forth several times to check that the size of the Strap varies correctly.
15 - Now check the simulation parameters on the "Simulation Settings" panel: all settings can be left at their default value. However, you can increase "Frames Per Second (FPS) Multiplier" to fine-tune the simulation, especially check that "Frame To Simulate" is set to "Animated (Use Timeline Play Range)" and that "Start Bones From Memorized Pose" is "Off".
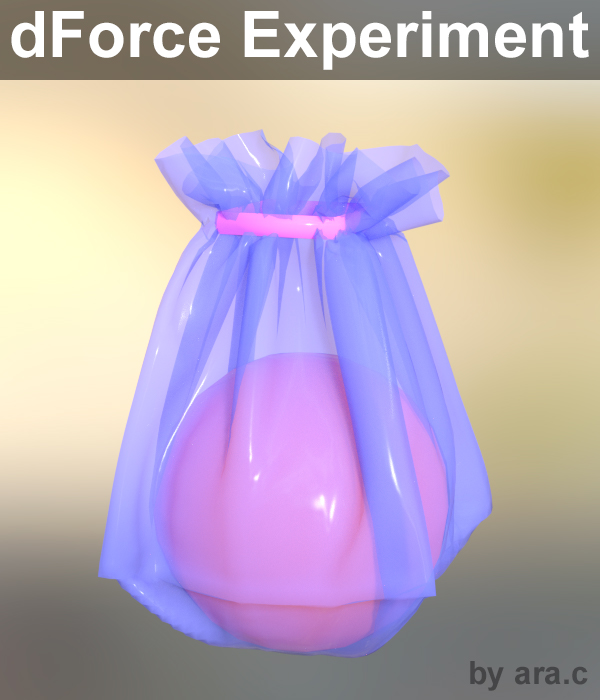
16 - Finally start the simulation. You should end up with something almost convincing, as in the image of the header.
Tip: as you can see, I put a little transparency in the material of the bag. Besides the fact that the result is rather nice, it allowed me especially to control the behavior of the ball during the simulation.
You notice that the 2 objects have exactly the same default values of dForce; yet the sphere seems much more rigid than the bag because its mesh resolution is weaker than that of the cube that forms the bag.
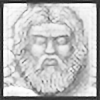
Let's go a little further. To enhance realism you can increase the weight of the ball. In the dForce settings of its surface set "Density (GPM)" (expressed in grams per square meter) to 2000. Simulate again. You should end up with something that looks like this: