Yes. At long last we are diving into the world of Eclipse journals! Prepare yourselves because this tutorial may beat them all as far as length goes. And by "beat" I mean it's gonna be longer...
Much longer.
Here is why this tutorial will rule them all:
- Where to Find Submitted Journals and Drafts
- Where to Create Your Journal
- Dissecting the Journal Editor
- Cover Images!
- Formatting Text
- Adding and Formatting Media
- Submitting Your Journal
Where to Find Submitted Journals & Drafts
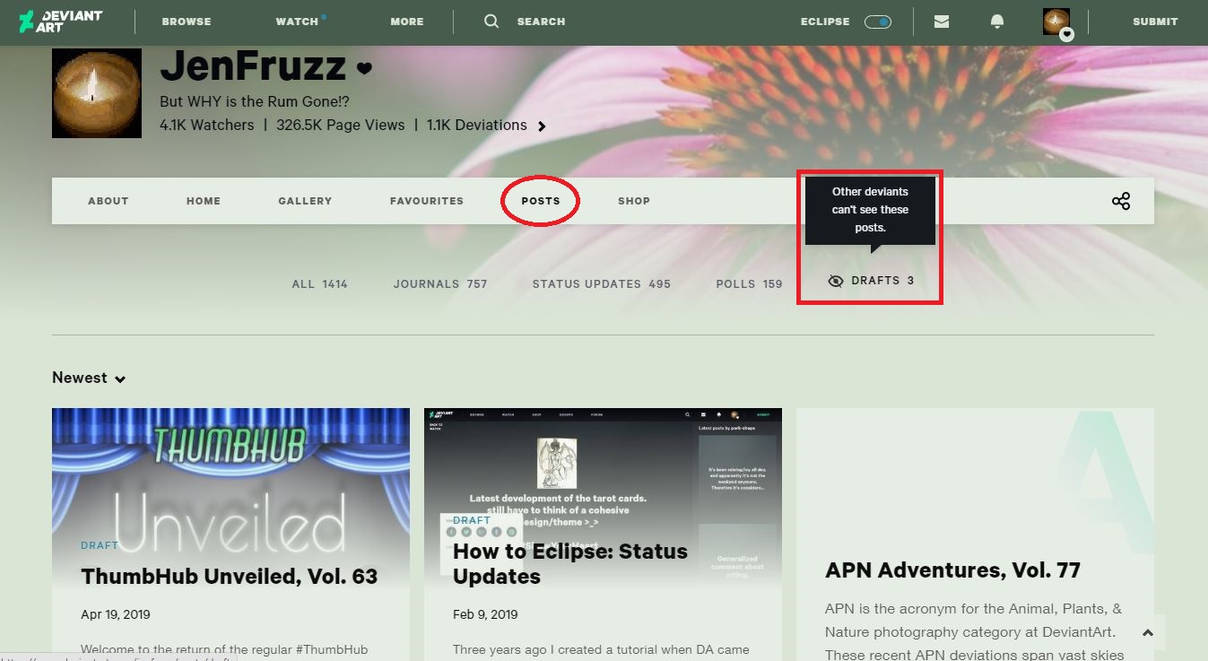
As Julie Andrews once sang, "Let's start at the very beginning..." and tell you where to find journals by both yourself and anyone else on DA. It's quick, it's easy, and that's why it's first. Just navigate to someone's profile and check out their Posts page. Then click Journals. BOOM!
Similarly with Drafts, navigating to that link (which you can only see on your own profile!) will take you to drafts that you have saved (more on that below) and want to continue writing (and here is a final, unnecessary parenthetical). WHOOSH!
Where to Create Your Journal
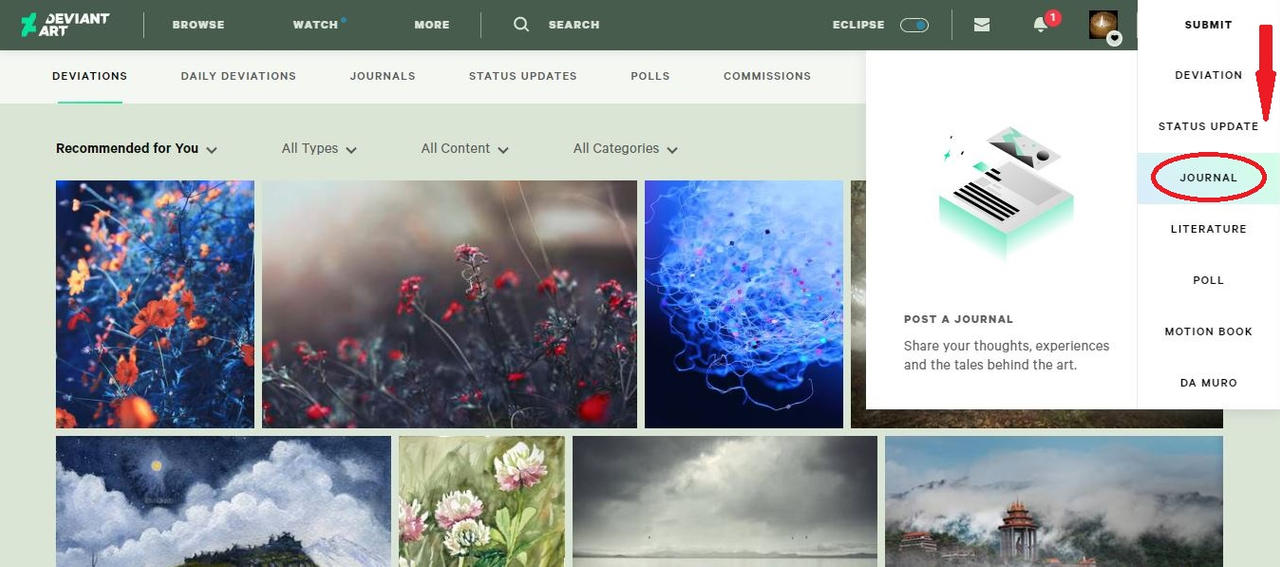
You are able to begin writing your journal no matter where you are on DA. Just hover over the Submit drop-down and, you guessed it, click on Journal. Away to the editor we go!
And voila, you have reached Eclipse's journal editor. A significant change from DeviantArt green to Eclipse is the centralizing of DA's word processor. While on the old site you could write journals from sta.sh or the journal page, Eclipse brings everything to one easy-to-find spot.
There are a lot of pieces to the journal editor page. We'll pick them apart in the next section...
Dissecting the Journal Editor
OBSERVE. The editor page:
1. Status Updates i
2.Current Status and Save Status
3. Featured Post option ii
4. Save as Draft (saved to the Draft page above)
2.Current Status and Save Status
3. Featured Post option ii
4. Save as Draft (saved to the Draft page above)
5. SUBMIT! iii
6. Title Section
7. Text area iv
6. Title Section
7. Text area iv
And the footnotes:
i: If you find your journal is SUPER short, you can easily change it to a status update!
ii: Selecting Featured will add your Journal to the Featured column on your Posts->Journal page! A great place for showcasing the journals you want people to see first.
iii: More on this at the end.
iv: Let your genius unfold.
Now that we have the lay of the land, we need to chat about Cover Images. Carry on, traveler!
Cover Images
Eclipse's journal editor allows you to very easily add a cover image (note: this is optional) to your journal. This can have a variety of uses. Whether your journal is part of a regular series (using the same cover image) or you want to feature an amazing artwork that caught your attention (hello generous curators!) the cover image is a great way to make your journal pop.
Simply click the "Add Cover" button and select an image from your gallery or sta.sh:
Formatting Text
Text formatting is a great way to call attention to a particular word, emphasize your very important points, and separate sections of really, really long Eclipse tutorials.
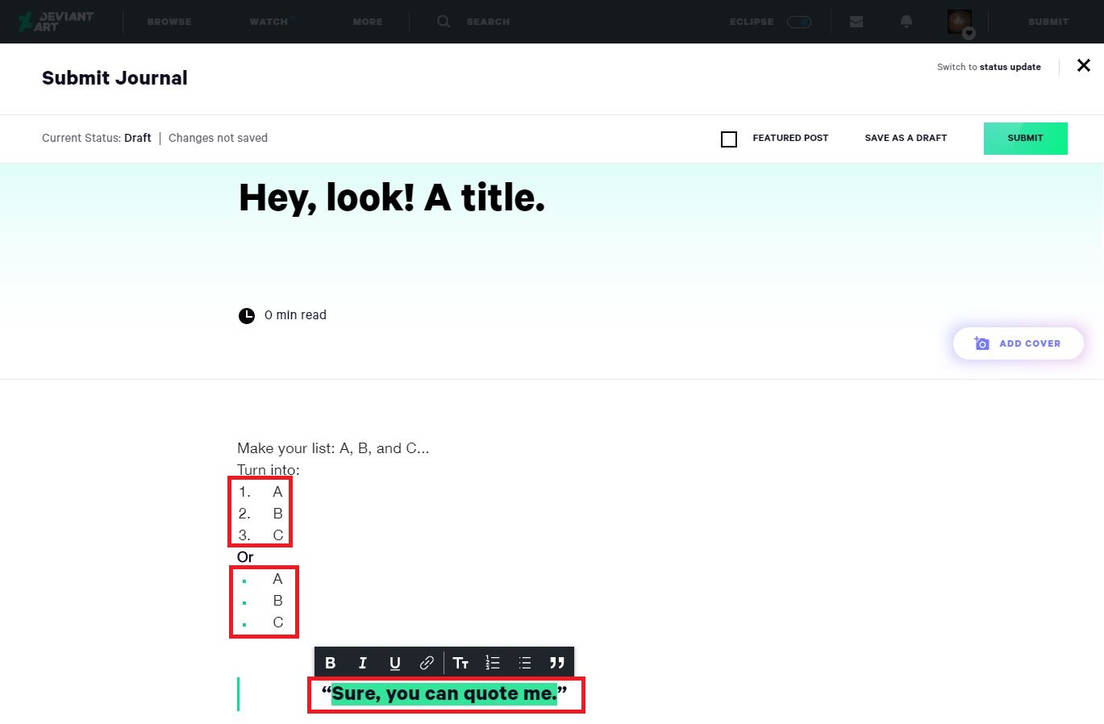
And it's super easy to boot. Just highlight the word or group of words you want to format. Once highlighted, a window will appear with a variety of options allowing you to make text bold, italicized, underlined, or two different styles of header (T1 and T2).
You can then go wild and turn your unorganized thoughts into an efficiently numbered or bulleted list! And if you're quoting someone profound (like me
Words are great, especially for the lit types, but when you're looking to add some visual flair to your journal... WHO YOU GONNA CALL?
Why, Mr. Rogers, of course! (just keep reading)
Adding and Formatting Media
For the curators and art appreciators of DeviantArt, you may want to include visual or literature artwork to your journals. This is a great way to break up longer sections of text or even focus in on a central theme or idea you're hoping to get across to those reading your journal!
Adding an Image
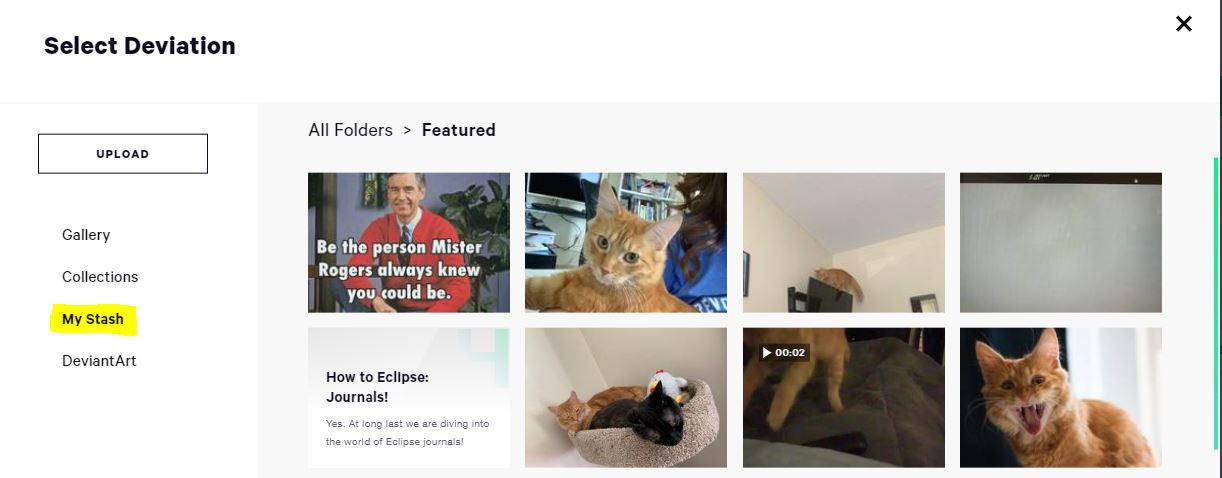
Which brings you to a menu where you can insert an image from your gallery, collections, sta.sh, or somewhere else on DeviantArt. You can even upload a piece directly to your sta.sh from this menu.
Once you select your
Formatting an Image
From left to right, the formatting options are a whole image, a left-aligned image, a right-aligned image, linking the image, changing it out, or removing it altogether. When aligning left or right, you'll notice things shift on the screen! You can format text to the opposite side of an aligned image. Have fun experimenting with these options.
Linking an Image
Sometimes you will want to have the image you insert link the reader elsewhere. It could be a different DA page or anywhere else on the internet. But how do?! Click the image again to bring up the formatting toolbar, then select the link icon (you know, the icon that is literally two links). Once you do that, a window will appear that allows you to add a URL and create your linking image!Adding Galleries
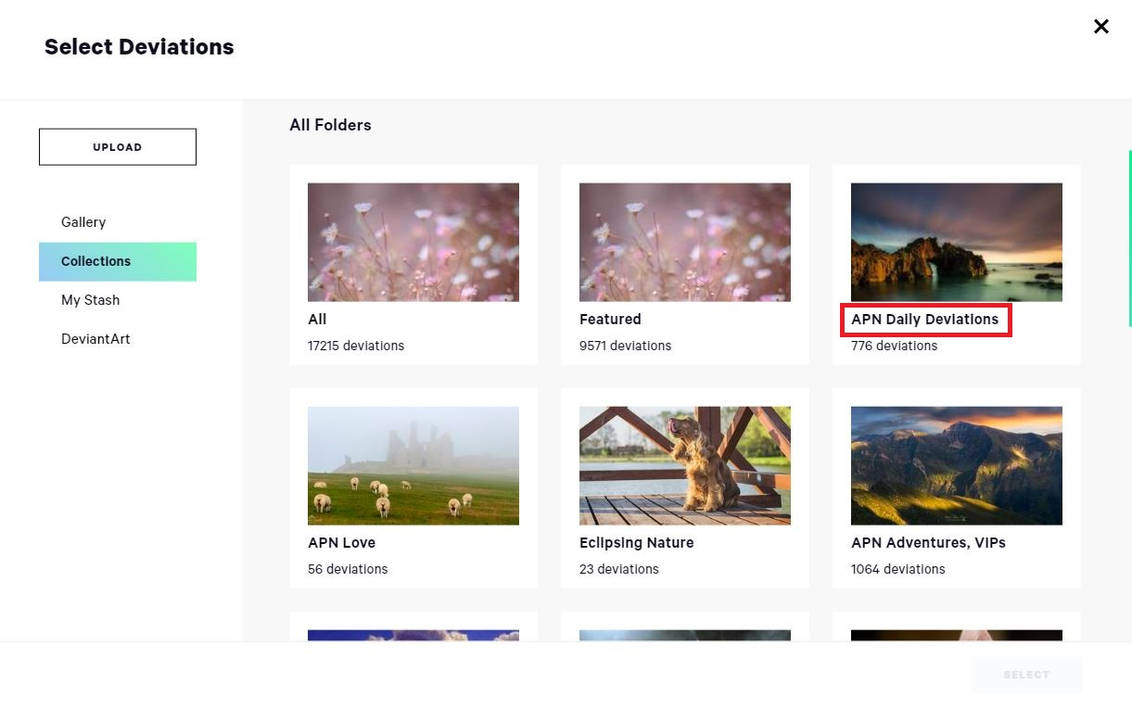
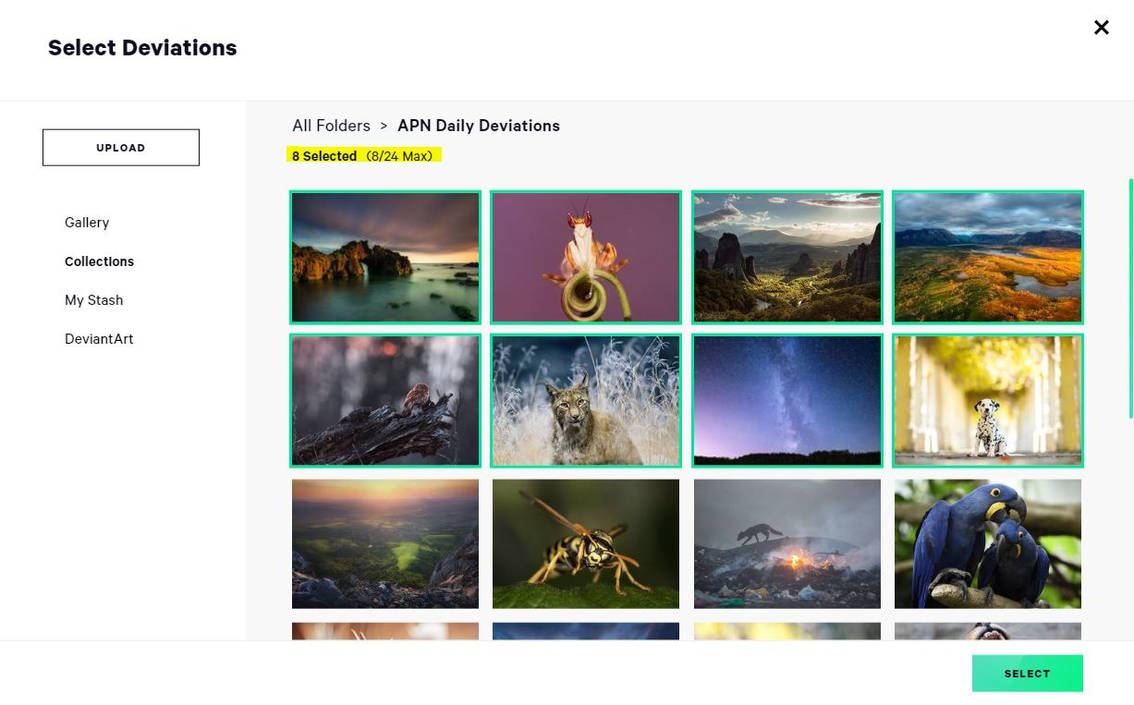
Head on back to the Linking an Image subsection. Remember that toolbar? Let's click the second icon, which is going to allow us to insert a group of images. Once you click it, you'll be presented with a menu that allows you to insert a gallery, collection, a group of images from sta.sh, or images from DeviantArt.Let's select my APN Daily Deviations collection and get some images into this journal. Once you're inside a folder/collection/etc. just click the images you want to add. You'll see a tally (highlighted below) letting you know how many you've selected out of 24 max.
When you're done, click the green Select button.
Formatting Galleries
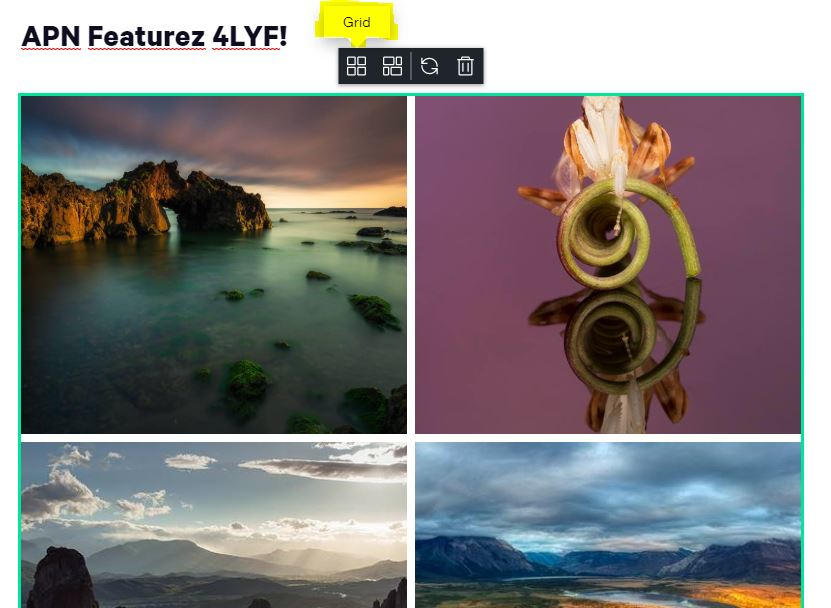
Galleries have their own set of formatting tools to easily fit a lot of images into one journal. Click any of the images to select the entire block. Then a toolbar appears with options to change the orientation of the gallery deviations, pick new deviations, or remove the gallery altogether.*NOTE: Gallery formatting options only work when adding groups of images from a gallery or collection. This will not work if you're only adding individual images.
The first option is the default: Grid view. This will organize the deviations in two columns of equal width and height.
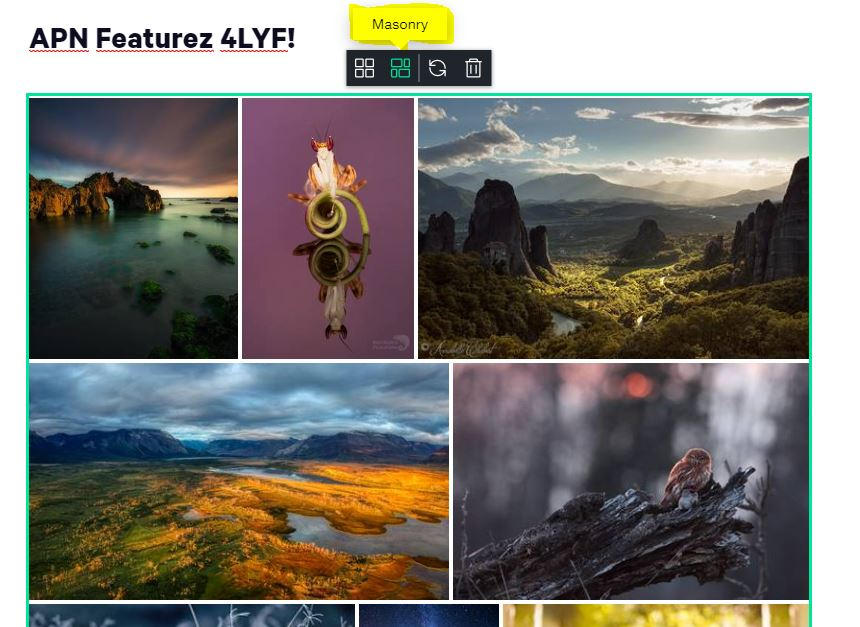
This can be ideal for many layouts but in some instances it may cut off an image (like the beheaded insect above) and you'll want to check out the Masonry option. This will orient the deviations according to their size, creating a mosaic of artwork instead of two columns.
Both options help artwork be displayed neatly and beautifully (with insect heads intact!). It is up to you which option fits your journal the best!
Adding Video, Emoticons, and GIFs:
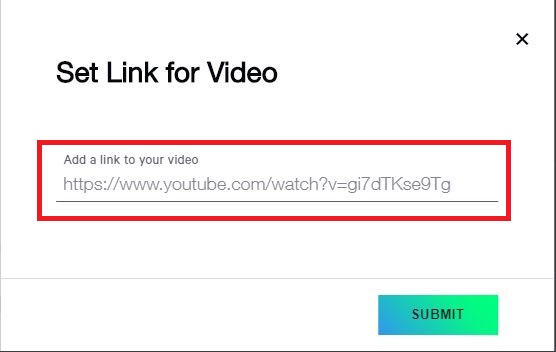
The last three options when adding media are much simpler than images and galleries! Eclipse's journal editor finally gives us the chance to easily embed YouTube videos directly into a journal! Simply click the video player icon and insert the YouTube URL you want to display:
Emoticons and avatars can be easily added using the smiley face icon. A menu will appear with options to add Official emoticons, Community emoticons, or user avatars. You can also click the search icon and type something specific!
And finally the GIF menu. Just click and you'll be able to quick search for the proper GIF for any journal. In our case, creepy Mr. Rogers:
Clicking the arrows will let you select a new GIF while the trashcan will remove it. Which I am doing... now.
Bye, Mr. Rogers.
Submitting Your Journal!
Just click that big green SUBMIT button at the top and away it goes into uploaded Posts land
What are some Eclipse-submitted journals that you love? Link them in the comments!
Questions?
If you have questions about cover images, please leave them in the comments! If you have general feedback about Eclipse, that is better left where staff will see it.
More "How to DeviantArt" Tutorials:
Skin by Dan Leveille


